Project Explorer
The Project Explorer is located on the left-hand side of the Form Studio window:

The Project Explorer Pane provides information about the contents and layout of your project, split over three tabs - Pages, Project and Datasources.
Click on the tabs within the Project Explorer Pane to move between them.
You can change the width of the Pane by moving your mouse pointer onto the double-lined border at the right-hand side of the Pane until it becomes a two-headed arrow and then click and drag the border to the left and right as required.
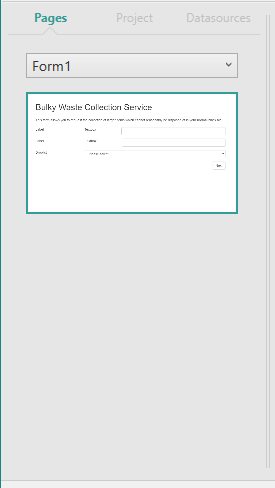
The Pages tab displays thumbnails of the pages in your project. The tab displays the pages in the currently selected form, so if you have more than one form in your project, select the form, whose pages you want to display, from the drop-down list at the top of the tab.
Click on a thumbnail to display the selected page within the Form Design workspace area so you can view or work on the page. You can also change the currently displayed page using the Up and Down Arrow, Home, End, PgUp and PgDn keys.
Right-clicking on a page thumbnail within this Pane will display a context-sensitive menu allowing you to add a new page, cut, copy, paste and delete the page, change the position of the page within the page list and display the page's Properties.
You can also move a page within the list by clicking and dragging it to its new position.
By default the pages will display within your finished form in the order in which they appear in the Pages tab.
Hovering your mouse pointer over a thumbnail, will display a tooltip showing the name of the page.
At any point within Form Studio you can return to viewing and editing your project pages by clicking on a page within the Pages tab, e.g. when editing scripts, you can exit the editor by clicking on a page in the Pages tab.
The Project tab displays information about various aspects of your project.
At the top of the Pane it provides information at the project level and below this is information relating to Form Studio. The project section includes a tree view of the forms within your project, the pages making up each form and a list of images you have used in your project. It also provides a list of any Datasources you have created, all the Styles available within your project, indicating whether they have been used or not, a list of any Templates you create and any of the supplied validation rules you have used in your project. These lists all use a standard tree view type display which can be expanded and collapsed in the usual way.
Right-clicking on most items in the list will display a context-sensitive menu providing various actions you can perform on the item on which you clicked, such as new, cut, copy, paste, delete and rename options. Some items will also have menu items for other features which are only relevant to the type of item on which you have clicked.
Selecting an item in the tree view will display the item's properties in the Properties Pane.
Selecting a page in the tree view, will display the page within the Form Design workspace area so you can view or work on the page.
Clicking on a Datasource will display the Datasource's properties in the Properties Pane. If your Datasource names are too long to be fully displayed, you can either change the width of the Pane, as described above, or hover your mouse pointer over the Datasource names in the tree view to display a tooltip showing the full name.
Each form in the tree view has a Script node below it, from which you can edit any custom JavaScript you add to your form.
The Datasources tab displays any Datasources you have set up and allows you to create new ones. A Datasource defines the connection to a SQL Server database table required by the form. A Datasource has one or more Datasets associated with it, which define sets of data items, or columns, in the database table.
Datasources are used for a variety of purposes within your forms. You can upload existing data from a remote database to be displayed in your form and potentially update the database with information entered into the form. You can create database tables to hold lists of items used to populate data entry fields on the form, where you want to present a list of predefined choices to the users and you will need a database table to store the information entered into the form by everyone who completes the form. For more information about Datasources, see the section on Datasources in the Digitise Forms User Guide.
If your Datasource names are too long to be fully displayed, you can either change the width of the Pane, as described above, or hover your mouse pointer over a Datasource to display a tooltip showing its full name.
